Pattern: Twig from Hilda
Jun. 4th, 2024 08:56 pmA pattern for a bidder with Fandom Trumps Hate! The winner requested Twig from the animated show "Hilda", and I did my best to oblige.
This is a fairly large pattern, on a similar scale to the MLP:FIM pattern in terms of size and amount of yarn used, so if you're familiar with that one, it's a decent benchmark. Like the MLP:FIM pattern, it also relies heavily on (US) double crochet.
Enough of that, though; time for pictures!


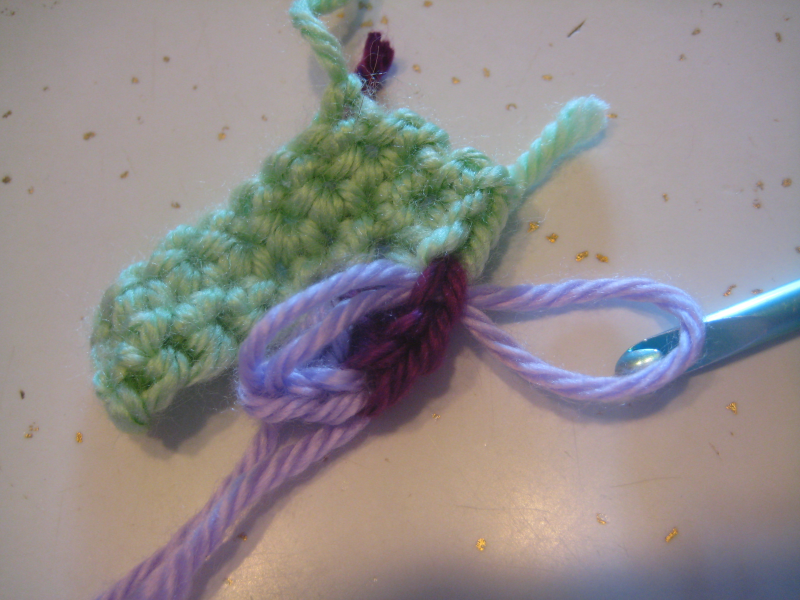
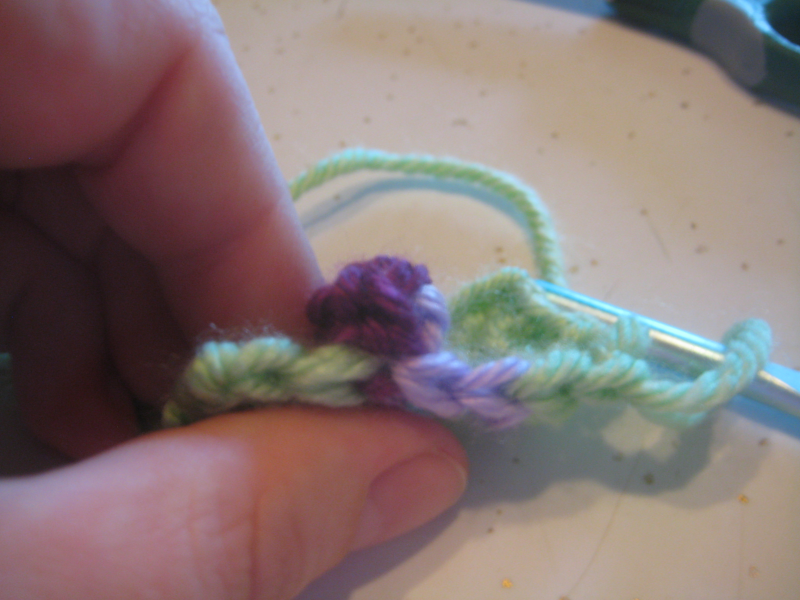
It's been long enough since I posted a pattern here that I no longer have my old photo setup 😅 I hope you can excuse me holding Twig in place for a couple of these!
In addition, I did also tweak the pattern slightly for the antlers after taking these photos (I wasn't up to re-doing them, removing the old ones, and attaching the new ones), so the final product won't look exactly the same as this, but I hope that these should still be useful as a visual guideline, so to speak. Similarly, I recommend tilting the ears at more of a horizontal angle than I have in these photos. (These ones I would have changed, but I couldn't find the yarn ends anymore!)
Pattern time!
SKILLS
Crocheting in the round [joined and unjoined rounds]
Recommended: Magic ring/circle
Chain stitch (ch)
Single crochet (sc)
Double crochet (dc)
Slip stitch (sl st)
Back loop only crochet (bl [stitch])*
Popcorn stitch (pop [stitch] [number of stitches to popcorn])**
Increasing ([stitch] 2 in 1)
Decreasing [double crochet] ([stitch] 2 tog)
US stitch terms used
* Back Loop Crochet: In each row of crochet, in the stitch you put your hook through, there are two “loops” of yarn. For front and back loop crochet, you only use one loop: For front loop crochet (not used in this pattern), you use only the loop that is closer to you (in front); for back loop crochet, you use only the loop that is farther away from you (in back).
Note: For this pattern, back loop crochet is used in part to make color changes look cleaner when switching from the hooves to the legs; using standard slip stitch or single crochet instead will still work fine, it will just look slightly rougher. However, back loop crochet on the bottom of the hooves is used to make a clean edge; I highly recommend either still using back loop crochet for those, or looking up front post crochet and using that instead.
** Popcorn Stitch: To make a popcorn stitch, you make the number and type of stitches indicated into a single stitch, like when you’re increasing (in this case, five). When you’ve made the final stitch, you remove your hook from the yarn, put it through the top of the first stitch in the popcorn group, then pull the working loop from the end of the popcorn group through that first stitch. This will make a little cluster of stitches that stick out from the rest of the work, like a ball. In the next round or row of stitches, treat the first stitch in the popcorn cluster as the only stitch. For this pattern, I used them as a connection base between the antler trunks and their branches. When crocheting the next round of the pattern, go through only the loop that you used to cluster the popcorn stitches together (the one you pulled from the last stitch through the first stitch).
MATERIALS
Scissors
Worsted weight yarn, white
Worsted weight yarn, black
Tapestry needle
Stuffing
Stitch markers (a scrap of contrasting yarn works fine)
One pair 15mm oval plastic safety eyes (optional)
One 15mm triangular plastic safety nose (optional)
1 or 2 black pipe cleaners or wire (optional)
Recommended hook size for yarn
Head (white yarn)
Round 1: Begin in the round and continue in a spiral; sc 1, dc 11; dc 1 in first sc
Round 2: Dc 2 in 1 x 12 (count 24)
Round 3: [Dc 2 in 1, dc 1] x 12 (count 36)
Round 4: [Dc 2 in 1, dc 5] x 6 (count 42)
Round 5: [Dc 2 in 1, dc 6] x 6 (count 48)
Round 6 thru 14: Dc 48
Round 15: [Dc 2 tog, dc 6] x 6 (count 42); If using safety eyes, apply now; eyes should be roughly level with the first round
Round 16: [Dc 2 tog, dc 5] x 6 (count 36)
Round 17: [Dc 2 tog, dc 1] x 12 (count 24); Stuff now
Round 18: Dc 2 tog x 12 (count 12); Add any extra stuffing as needed
Round 19: Dc 2 tog x 6 (count 6)
Round 20: Sc every other stitch x 3; sl st to close
Fin
Snout (white yarn)
Round 1: Begin in the round and continue in a spiral; sc 1, dc 11; dc 1 in first sc
Round 2: [Dc 3, dc 2 in 1 x 6] x 2 (count 18)
Round 3: Dc 14, dc 2 in 1 x 2, dc 2 (count 20)
Round 4: Dc 15, dc 2 in 1 x 2, dc 2 (count 22)
Round 5: Dc 16, dc 2 in 1 x 2, dc 2 (count 24)
Round 6: Sc 1, sl st 1 to finish
Fin
Orient the snout so the row of increasing stitches is at the bottom; the opposite side is now the top. If using a safety nose, apply it now to the top of the first round. Pin the snout in place with the top of the final round just touching the bottom of the first round of the head, so the bottom of the final round reaches under the head, and the sides go roughly to either eye. Sew in place, stuffing when you have sewn it roughly ¾ closed.
Ears (make 2, white yarn)
Round 1: Begin in the round and continue in a spiral; sc 6
Round 2: Dc 6
Round 3: [Dc 2 in 1, dc 1] x 3 (count 9)
Round 4: [Dc 2 in 1, dc 2] x 3 (count 12)
Round 5: Dc 12
Round 6: [Dc 2 tog, dc 2] x 3 (count 9); If stuffing, stuff now
Round 7: [Dc 2 tog, dc 1] x 3 (count 6)
Round 8: Sc 1, sl st 1 to finish
Fin
If you did not stuff the ears, sew them flat; if the tail end from the beginning of the yarn is long enough, use that.
Once the ears are finished, sew the final round of each ear to the head; position them on opposite sides of the head, around 1/3 of the way down and around Round 16 or 17, where the head starts narrowing. Make sure that the first rounds of the ears are pointing away from the snout.
Antlers: Trunk (make 2, black yarn)
Round 1: Sc 6
Round 2 thru 7: Dc 6
Round 8: Pop Dc 6, dc 5 (count 6)
Round 9 thru 11: Dc 6
Round 12: Sc 1, sl st 1 to finish
Fin
Antlers: Branch (make 2, black yarn)
Round 1: Sc 6
Round 2 thru 5: Dc 6
Round 6: Sc 1, sl st 1 to finish
Fin
Stuff the antler branches and bases with extra black yarn. Sew the bottom of the antler branches closed. Then, with the final round of both pieces pointing in the same direction, sew the side of the final round of one antler branch to the popcorn stitch of each antler base.
Position the antlers so the branches point in away from the head; sew the final round of the bases to the head roughly the same distance apart as the eyes, around round 4 or 5. Make sure that the antler branches point mostly towards the nose, with the left one pointing slightly out to the left and the right one slightly out to the right.
Note: For more stability/pose-ability, thread a black pipe cleaner through the head before sewing the antlers on. Make sure the ends of the pipe cleaner come out where you want to attach the antlers, and secure them there by wrapping them once around a stitch. Pull the antlers over the pipe cleaner ends before sewing them in place.
Neck (white yarn)
Round 1: Ch 20; sl st through the first ch to form a ring
Round 2: Sc 5, dc 10, sc 5
Round 3: Sc 5, dc 4, dc 2 in 1, dc 5, sc 5
Round 4: Sc 5, dc 5, dc 2 in 1, dc 5, sc 5
Round 5: Sl st 1 for a smooth finish
Fin
Torso (white yarn)
Round 1: Begin in a round; sc 6; continue in a spiral
Round 2: Dc 2 in 1 x 6 (count 12)
Round 3: [Dc 1, dc 2 in 1] x 6)
Round 4: Dc 24 ([dc 2, dc 2 in 1] x 6)
Round 5: Dc 30 ([dc 3, dc 2 in 1] x 6)
Round 6: Dc 36 ([dc 4, dc 2 in 1] x 6)
Round 7: Dc 36
Round 8: Dc 2 tog, dc 34
Round 9: Dc 2 tog, dc 33
Round 10: Dc 2 tog, dc 32
Round 11: Dc 2 tog, dc 31
Round 12: Dc 2 tog, dc 30
Round 13: Dc 2 tog, dc 29
Round 14 thru 18: Dc 30
Round 19: Dc 3, dc 2 tog] x 6 (count 24; Stuff here
Round 20: Dc 2, dc 2 tog] x 6 (count 18)
Round 21: Dc 1, dc 2 tog] x 6 (count 12); Add any additional stuffing as needed
Round 22: Dc 2 tog x 6 (count 6)
Round 23: Sc 3 (every other stitch)
Finish
Position the torso so the line of decrease stitches are at the bottom. Then, position the neck so the final increase stitch in the last round is just at the top of the first round of the torso. Pin the rest of the final round of the neck in place, so the single crochet stitches form the back of the neck on top of the torso. Sew in place.
Hoof Outer Section (make 4; black yarn)
Round 1: Begin in the round; sc 6; sl st into the first sc to make a joined round
Round 2: Ch 3 to start; dc 2 in 1 x 6 (count 12); do not join this round! Instead, ch 3 and switch to rows
Row 3: Bl dc 12
Row 4: Dc 12; switch to unjoined/spiraling rounds, and make the next stitch in the first dc of row 4
Round 5: Sc 11, sl st 1; leave a long tail when you cut
Fin
Hoof Cleft (make 4; black yarn)
Row 1: Ch 3, dc 1 in first ch stitch
Row 2: Dc 3 in 1
Fin
Align a hoof cleft so the starting chain stitch is pointing upward; match it up to the first single crochet in the fifth round of a hoof outer section. Sew the outer edge of the cleft along the sides of the hole in the hoof outer section, taking care to close any gaps formed by turning chains. Repeat for all hooves.
Front legs (make one with each ending; white yarn)
Round 1: Continue from the final stitch of a complete hoof, changing color to white; bl dc 12
Round 2 thru 4: Dc 12; stuff up to here
Round 5 thru 7: Dc 4, dc 2 tog, dc 5, dc 2 in 1 (count 12)
Ending 1:
Round 8: Dc 4, dc 2 tog, dc 5, dc 2 in 1 (count 12)
Round 9: Sc 1, sl st 1; finish stuffing
Fin
Ending 2:
Round 8 version 2: Dc 4, dc 2 tog, sc 5, sc 2 in 1 (count 12)
Round 9: Sc 4, sl st 1; finish stuffing
Fin
Back legs (make one with each ending; white yarn)
Round 1: Continue from the final stitch of a complete hoof, changing color to white; bl dc 12
Round 2: Dc 12
Round 3, 4: Dc 4, dc 2 tog, dc 5, dc 2 in 1 (count 12)
Round 5: Dc 12; stuff up to here
Round 6: [Dc 5, dc 2in 1] x 2 (count 14)
Round 7: [Dc 6, dc 2 in 1] x 2 (count 16)
Round 8: [Dc 7, dc 2 in 1] x 2 (count 18)
Round 9: [Dc 8, dc 2 in 1] x 2 (count 20)
Ending 1:
Round 10: Dc 20
Round 11: Sc 1, sl st 1; finish stuffing
Fin
Ending 2:
Round 10: Dc 10, sc 10 (count 20)
Round 11: Sc 9, sl st 1; finish stuffing
Fin
By making one version with each ending, you will end up with two legs whose final rounds are at slightly different angles. This will make it easier to attach one to each side cleanly. Note also that it will be easier to stuff the legs in stages, rather than to try and shape stuffing around the joints.
Treat the legs so the cleft of the hoof is at the front. Attach the legs that are taller on the right side to the right side of the torso, and the legs that are taller on the left side to the left side of the torso.
Position the front legs so the back is roughly in line with the back of the neck; sew in place about a quarter of the way up from the bottom of the torso’s rib cage.
Position the back legs so the outside edge/high side is just slightly higher than the final round of the front legs, and the back end of the legs are at about round 21 of the torso (second-to-last round). Sew in place.
Tail (white yarn)
Round 1: Ch 12; sl st in first chain to make a loop (count 12)
Round 2: Sc 2, dc 11 (count 12)
Round 3: [Dc 2 in 1, dc 3] x 3 (count 15)
Round 4: [Dc 2 in 1, dc 4] x 3 (count 18)
Round 5: [Dc 2 in 1, dc 5] x 3 (count 21)
Round 6: [Dc 2 in 1, dc 6] x 3 (count 24)
Round 7: [Dc 2 in 1, dc 7] x 3 (count 27)
Round 8: [Dc 2 in 1, dc 8] x 3 (count 30)
Round 9 thru 11: Dc 30; stuff part way
Round 12: [Dc 8, dc 2 tog] x 2, dc 8, dc 2 in 1 x 2 (count 30)
Round 13: Dc y, dc 2 tog, dc 8, dc 2 tog, dc 8, dc 2 in 1 x 2, dc 1 (count 30)
Round 14: [Dc 7, dc 2 tog] x 2, dc 8, dc 2 in 1 x 2, dc 2 (count 30)
Round 15 thru 17: Dc 30; stuff part way
Round 18: Dc 2, dc 2 tog, dc 18, dc 2 tog, dc 6 (count 28)
Round 19: Dc 2, dc 2 tog, dc 16, dc 2 tog, dc 6 (count 26)
Round 20: Dc 2, dc 2 tog, dc 14, dc 2 tog, dc 6 (count 24)
Round 21: [Dc 2 tog, dc 2] x 6 (count 18)
Round 22: [Dc 2 tog, dc 1] x 6 (count 12); finish stuffing
Round 23: [Dc 2 tog, dc 1] x 3 (count 9)
Round 24: Sc 2 tog x 4
Fin
The strategic increases and decreases should give the tail a natural S-curve.
Decide whether you want the end of the tail to be up or down; up is more similar to Twig’s poses in the show, while down may offer more stability and allow Twig to stand on its own better.
Position the tail so that the final round faces away from the nose. Sew the first round to the back of the torso so the top of the first round is roughly level with the top of the torso.
Final touches: Use black yarn to create the spots on Twig’s rear end; chunky weight yarn can speed the process up. You can also cut black felt into the correct shape and size and hot glue it in place.
For Twig’s tail markings, measure a length of black worsted weight yarn to go all the way around round 17 two or three times. Using a tapestry needle, thread the yarn through every fifth or sixth stitch of round 17, leaving enough slack for the yarn to form an arc. Secure the loops in place by sewing them down with black thread or hot gluing them down.
To give the end of Twig’s tail and the front of Twig’s chest a fluffy appearance, start with a length of worsted weight yarn. For the tail, sew loose loops, similar to the tail markings, from about the base of round 22 to the final round in an even ring. For Twig’s chest, sew the loops in three overlapping vertical layers to cover the first two rounds of the torso.
And you're done!
If anyone has any trouble with this pattern, please let me know and I'll do my best to clear things up in the comments section!
This is a fairly large pattern, on a similar scale to the MLP:FIM pattern in terms of size and amount of yarn used, so if you're familiar with that one, it's a decent benchmark. Like the MLP:FIM pattern, it also relies heavily on (US) double crochet.
Enough of that, though; time for pictures!
It's been long enough since I posted a pattern here that I no longer have my old photo setup 😅 I hope you can excuse me holding Twig in place for a couple of these!
In addition, I did also tweak the pattern slightly for the antlers after taking these photos (I wasn't up to re-doing them, removing the old ones, and attaching the new ones), so the final product won't look exactly the same as this, but I hope that these should still be useful as a visual guideline, so to speak. Similarly, I recommend tilting the ears at more of a horizontal angle than I have in these photos. (These ones I would have changed, but I couldn't find the yarn ends anymore!)
Pattern time!
SKILLS
Crocheting in the round [joined and unjoined rounds]
Recommended: Magic ring/circle
Chain stitch (ch)
Single crochet (sc)
Double crochet (dc)
Slip stitch (sl st)
Back loop only crochet (bl [stitch])*
Popcorn stitch (pop [stitch] [number of stitches to popcorn])**
Increasing ([stitch] 2 in 1)
Decreasing [double crochet] ([stitch] 2 tog)
US stitch terms used
* Back Loop Crochet: In each row of crochet, in the stitch you put your hook through, there are two “loops” of yarn. For front and back loop crochet, you only use one loop: For front loop crochet (not used in this pattern), you use only the loop that is closer to you (in front); for back loop crochet, you use only the loop that is farther away from you (in back).
Note: For this pattern, back loop crochet is used in part to make color changes look cleaner when switching from the hooves to the legs; using standard slip stitch or single crochet instead will still work fine, it will just look slightly rougher. However, back loop crochet on the bottom of the hooves is used to make a clean edge; I highly recommend either still using back loop crochet for those, or looking up front post crochet and using that instead.
** Popcorn Stitch: To make a popcorn stitch, you make the number and type of stitches indicated into a single stitch, like when you’re increasing (in this case, five). When you’ve made the final stitch, you remove your hook from the yarn, put it through the top of the first stitch in the popcorn group, then pull the working loop from the end of the popcorn group through that first stitch. This will make a little cluster of stitches that stick out from the rest of the work, like a ball. In the next round or row of stitches, treat the first stitch in the popcorn cluster as the only stitch. For this pattern, I used them as a connection base between the antler trunks and their branches. When crocheting the next round of the pattern, go through only the loop that you used to cluster the popcorn stitches together (the one you pulled from the last stitch through the first stitch).
MATERIALS
Scissors
Worsted weight yarn, white
Worsted weight yarn, black
Tapestry needle
Stuffing
Stitch markers (a scrap of contrasting yarn works fine)
One pair 15mm oval plastic safety eyes (optional)
One 15mm triangular plastic safety nose (optional)
1 or 2 black pipe cleaners or wire (optional)
Recommended hook size for yarn
Head (white yarn)
Round 1: Begin in the round and continue in a spiral; sc 1, dc 11; dc 1 in first sc
Round 2: Dc 2 in 1 x 12 (count 24)
Round 3: [Dc 2 in 1, dc 1] x 12 (count 36)
Round 4: [Dc 2 in 1, dc 5] x 6 (count 42)
Round 5: [Dc 2 in 1, dc 6] x 6 (count 48)
Round 6 thru 14: Dc 48
Round 15: [Dc 2 tog, dc 6] x 6 (count 42); If using safety eyes, apply now; eyes should be roughly level with the first round
Round 16: [Dc 2 tog, dc 5] x 6 (count 36)
Round 17: [Dc 2 tog, dc 1] x 12 (count 24); Stuff now
Round 18: Dc 2 tog x 12 (count 12); Add any extra stuffing as needed
Round 19: Dc 2 tog x 6 (count 6)
Round 20: Sc every other stitch x 3; sl st to close
Fin
Snout (white yarn)
Round 1: Begin in the round and continue in a spiral; sc 1, dc 11; dc 1 in first sc
Round 2: [Dc 3, dc 2 in 1 x 6] x 2 (count 18)
Round 3: Dc 14, dc 2 in 1 x 2, dc 2 (count 20)
Round 4: Dc 15, dc 2 in 1 x 2, dc 2 (count 22)
Round 5: Dc 16, dc 2 in 1 x 2, dc 2 (count 24)
Round 6: Sc 1, sl st 1 to finish
Fin
Orient the snout so the row of increasing stitches is at the bottom; the opposite side is now the top. If using a safety nose, apply it now to the top of the first round. Pin the snout in place with the top of the final round just touching the bottom of the first round of the head, so the bottom of the final round reaches under the head, and the sides go roughly to either eye. Sew in place, stuffing when you have sewn it roughly ¾ closed.
Ears (make 2, white yarn)
Round 1: Begin in the round and continue in a spiral; sc 6
Round 2: Dc 6
Round 3: [Dc 2 in 1, dc 1] x 3 (count 9)
Round 4: [Dc 2 in 1, dc 2] x 3 (count 12)
Round 5: Dc 12
Round 6: [Dc 2 tog, dc 2] x 3 (count 9); If stuffing, stuff now
Round 7: [Dc 2 tog, dc 1] x 3 (count 6)
Round 8: Sc 1, sl st 1 to finish
Fin
If you did not stuff the ears, sew them flat; if the tail end from the beginning of the yarn is long enough, use that.
Once the ears are finished, sew the final round of each ear to the head; position them on opposite sides of the head, around 1/3 of the way down and around Round 16 or 17, where the head starts narrowing. Make sure that the first rounds of the ears are pointing away from the snout.
Antlers: Trunk (make 2, black yarn)
Round 1: Sc 6
Round 2 thru 7: Dc 6
Round 8: Pop Dc 6, dc 5 (count 6)
Round 9 thru 11: Dc 6
Round 12: Sc 1, sl st 1 to finish
Fin
Antlers: Branch (make 2, black yarn)
Round 1: Sc 6
Round 2 thru 5: Dc 6
Round 6: Sc 1, sl st 1 to finish
Fin
Stuff the antler branches and bases with extra black yarn. Sew the bottom of the antler branches closed. Then, with the final round of both pieces pointing in the same direction, sew the side of the final round of one antler branch to the popcorn stitch of each antler base.
Position the antlers so the branches point in away from the head; sew the final round of the bases to the head roughly the same distance apart as the eyes, around round 4 or 5. Make sure that the antler branches point mostly towards the nose, with the left one pointing slightly out to the left and the right one slightly out to the right.
Note: For more stability/pose-ability, thread a black pipe cleaner through the head before sewing the antlers on. Make sure the ends of the pipe cleaner come out where you want to attach the antlers, and secure them there by wrapping them once around a stitch. Pull the antlers over the pipe cleaner ends before sewing them in place.
Neck (white yarn)
Round 1: Ch 20; sl st through the first ch to form a ring
Round 2: Sc 5, dc 10, sc 5
Round 3: Sc 5, dc 4, dc 2 in 1, dc 5, sc 5
Round 4: Sc 5, dc 5, dc 2 in 1, dc 5, sc 5
Round 5: Sl st 1 for a smooth finish
Fin
Torso (white yarn)
Round 1: Begin in a round; sc 6; continue in a spiral
Round 2: Dc 2 in 1 x 6 (count 12)
Round 3: [Dc 1, dc 2 in 1] x 6)
Round 4: Dc 24 ([dc 2, dc 2 in 1] x 6)
Round 5: Dc 30 ([dc 3, dc 2 in 1] x 6)
Round 6: Dc 36 ([dc 4, dc 2 in 1] x 6)
Round 7: Dc 36
Round 8: Dc 2 tog, dc 34
Round 9: Dc 2 tog, dc 33
Round 10: Dc 2 tog, dc 32
Round 11: Dc 2 tog, dc 31
Round 12: Dc 2 tog, dc 30
Round 13: Dc 2 tog, dc 29
Round 14 thru 18: Dc 30
Round 19: Dc 3, dc 2 tog] x 6 (count 24; Stuff here
Round 20: Dc 2, dc 2 tog] x 6 (count 18)
Round 21: Dc 1, dc 2 tog] x 6 (count 12); Add any additional stuffing as needed
Round 22: Dc 2 tog x 6 (count 6)
Round 23: Sc 3 (every other stitch)
Finish
Position the torso so the line of decrease stitches are at the bottom. Then, position the neck so the final increase stitch in the last round is just at the top of the first round of the torso. Pin the rest of the final round of the neck in place, so the single crochet stitches form the back of the neck on top of the torso. Sew in place.
Hoof Outer Section (make 4; black yarn)
Round 1: Begin in the round; sc 6; sl st into the first sc to make a joined round
Round 2: Ch 3 to start; dc 2 in 1 x 6 (count 12); do not join this round! Instead, ch 3 and switch to rows
Row 3: Bl dc 12
Row 4: Dc 12; switch to unjoined/spiraling rounds, and make the next stitch in the first dc of row 4
Round 5: Sc 11, sl st 1; leave a long tail when you cut
Fin
Hoof Cleft (make 4; black yarn)
Row 1: Ch 3, dc 1 in first ch stitch
Row 2: Dc 3 in 1
Fin
Align a hoof cleft so the starting chain stitch is pointing upward; match it up to the first single crochet in the fifth round of a hoof outer section. Sew the outer edge of the cleft along the sides of the hole in the hoof outer section, taking care to close any gaps formed by turning chains. Repeat for all hooves.
Front legs (make one with each ending; white yarn)
Round 1: Continue from the final stitch of a complete hoof, changing color to white; bl dc 12
Round 2 thru 4: Dc 12; stuff up to here
Round 5 thru 7: Dc 4, dc 2 tog, dc 5, dc 2 in 1 (count 12)
Ending 1:
Round 8: Dc 4, dc 2 tog, dc 5, dc 2 in 1 (count 12)
Round 9: Sc 1, sl st 1; finish stuffing
Fin
Ending 2:
Round 8 version 2: Dc 4, dc 2 tog, sc 5, sc 2 in 1 (count 12)
Round 9: Sc 4, sl st 1; finish stuffing
Fin
Back legs (make one with each ending; white yarn)
Round 1: Continue from the final stitch of a complete hoof, changing color to white; bl dc 12
Round 2: Dc 12
Round 3, 4: Dc 4, dc 2 tog, dc 5, dc 2 in 1 (count 12)
Round 5: Dc 12; stuff up to here
Round 6: [Dc 5, dc 2in 1] x 2 (count 14)
Round 7: [Dc 6, dc 2 in 1] x 2 (count 16)
Round 8: [Dc 7, dc 2 in 1] x 2 (count 18)
Round 9: [Dc 8, dc 2 in 1] x 2 (count 20)
Ending 1:
Round 10: Dc 20
Round 11: Sc 1, sl st 1; finish stuffing
Fin
Ending 2:
Round 10: Dc 10, sc 10 (count 20)
Round 11: Sc 9, sl st 1; finish stuffing
Fin
By making one version with each ending, you will end up with two legs whose final rounds are at slightly different angles. This will make it easier to attach one to each side cleanly. Note also that it will be easier to stuff the legs in stages, rather than to try and shape stuffing around the joints.
Treat the legs so the cleft of the hoof is at the front. Attach the legs that are taller on the right side to the right side of the torso, and the legs that are taller on the left side to the left side of the torso.
Position the front legs so the back is roughly in line with the back of the neck; sew in place about a quarter of the way up from the bottom of the torso’s rib cage.
Position the back legs so the outside edge/high side is just slightly higher than the final round of the front legs, and the back end of the legs are at about round 21 of the torso (second-to-last round). Sew in place.
Tail (white yarn)
Round 1: Ch 12; sl st in first chain to make a loop (count 12)
Round 2: Sc 2, dc 11 (count 12)
Round 3: [Dc 2 in 1, dc 3] x 3 (count 15)
Round 4: [Dc 2 in 1, dc 4] x 3 (count 18)
Round 5: [Dc 2 in 1, dc 5] x 3 (count 21)
Round 6: [Dc 2 in 1, dc 6] x 3 (count 24)
Round 7: [Dc 2 in 1, dc 7] x 3 (count 27)
Round 8: [Dc 2 in 1, dc 8] x 3 (count 30)
Round 9 thru 11: Dc 30; stuff part way
Round 12: [Dc 8, dc 2 tog] x 2, dc 8, dc 2 in 1 x 2 (count 30)
Round 13: Dc y, dc 2 tog, dc 8, dc 2 tog, dc 8, dc 2 in 1 x 2, dc 1 (count 30)
Round 14: [Dc 7, dc 2 tog] x 2, dc 8, dc 2 in 1 x 2, dc 2 (count 30)
Round 15 thru 17: Dc 30; stuff part way
Round 18: Dc 2, dc 2 tog, dc 18, dc 2 tog, dc 6 (count 28)
Round 19: Dc 2, dc 2 tog, dc 16, dc 2 tog, dc 6 (count 26)
Round 20: Dc 2, dc 2 tog, dc 14, dc 2 tog, dc 6 (count 24)
Round 21: [Dc 2 tog, dc 2] x 6 (count 18)
Round 22: [Dc 2 tog, dc 1] x 6 (count 12); finish stuffing
Round 23: [Dc 2 tog, dc 1] x 3 (count 9)
Round 24: Sc 2 tog x 4
Fin
The strategic increases and decreases should give the tail a natural S-curve.
Decide whether you want the end of the tail to be up or down; up is more similar to Twig’s poses in the show, while down may offer more stability and allow Twig to stand on its own better.
Position the tail so that the final round faces away from the nose. Sew the first round to the back of the torso so the top of the first round is roughly level with the top of the torso.
Final touches: Use black yarn to create the spots on Twig’s rear end; chunky weight yarn can speed the process up. You can also cut black felt into the correct shape and size and hot glue it in place.
For Twig’s tail markings, measure a length of black worsted weight yarn to go all the way around round 17 two or three times. Using a tapestry needle, thread the yarn through every fifth or sixth stitch of round 17, leaving enough slack for the yarn to form an arc. Secure the loops in place by sewing them down with black thread or hot gluing them down.
To give the end of Twig’s tail and the front of Twig’s chest a fluffy appearance, start with a length of worsted weight yarn. For the tail, sew loose loops, similar to the tail markings, from about the base of round 22 to the final round in an even ring. For Twig’s chest, sew the loops in three overlapping vertical layers to cover the first two rounds of the torso.
And you're done!
If anyone has any trouble with this pattern, please let me know and I'll do my best to clear things up in the comments section!